Showing posts with label crafts. Show all posts

Saturday, November 19, 2011

My Version of the Fabric Covered Jewelry Hanger

My neighbor saw a jewelry holder I had pinned on pinterest, and wanted to know if I could make a couple to match her daughter's room.  The photo was from etsy (see here)... and didn't exactly include a tutorial.  I assumed the fabric had been wrapped around boards, but on a visit to Micheals I saw a package of cute chunky canvases.  They were the perfect size, and the perfect price after using a 40% off coupon!


For this project you only need a couple items, pictured below.  A drill, a staple gun, hooks, ruler and pencil.

First, mark with a pencil where you want your hooks to be.  I measured this out with the ruler.  You can also put hooks on the sides or front of the jewelry holder, I decided to stick with the original picture since I was making it for a friend, but I think hooks on the front and sides would be cute too!  Drill your holes.


Next decide what portion of the fabric you want to show on the front, make sure you leave enough to wrap around the sides... and then cut your fabric.


Next comes the staple gun part!  The most important thing is to stretch the fabric TIGHT as you staple. Start on the middle of one side, then stretch and staple directly accross from it.  Work your way out to the edge, pulling the fabric tight between each staple.  Make the corners look pretty from the front and sides, then pull them around and staple on the back.


Next screw in your hooks!  I used a straight pin to poke through the fabric to find the holes.


I should probably ask my neighbor for a picture of them hanging in the room!  Such a simple project.
I also attached a sawtooth hanger on the back of each one.

Tuesday, October 11, 2011

Cardboard Creations

One of my favorite childhood stories was Chistina Katerina & The Box, by Patricia Lee Gauch.  It is the story of a girl who loves imaginative play, dressing up, and turning everyday objects into treasures.  Her favorite things in the world are boxes of all kinds.  (Yes, I still have my original copy... and yes it is well worn and loved and has survived its second generation of children!)


The story begins with the delivery of a new refrigerator.
Christina's mother says "Oh, how grand and new," looking at the refrigerator...
"It is!  Oh, it really is!"  says Christina, looking at the box.

The giant box goes through transformation after transformation providing weeks of castle living, race car driving, election scandals, fig newton enjoyment, and a summer ball in the front yard, before falling victim to the garden hose.

Today's post touches on a lifetime's worth of cardboard creations which began with this storybook.  With Halloween just around the corner, I share with you the Haunted Mansion Beanbag Toss from our neighborhood party a couple years ago.  It doubled as a clubhouse as well for a while.

Made from two boxes (one quite large) with windows and doors cut out.  Spray painted black and decorated with foam shapes and spiderweb.  We ran an extension cord to it, to light it up from the inside... so the numbered target holes were visible when it got really dark that night. 

The inspiration for this post was discovered on pinterest.  You can find amazing ways to recycle your boxes at a blog called ikatbag.  Below are just a couple of her creations, click the ikatbag link to see more!  For her tutorial (and tons more ideas!), click here.  For a bunch of additional cardboard links she lists, click here.


Thanks for reading!


Wednesday, August 31, 2011

Giant Nail Polish

If you've ever wanted a Giant Nail Polish all for your own... I have the tutorial for you!  This particular model was actually used as a prop in a skit, not as a shelf ornament...


What is a girl to do, when given such an odd prop assignment?  Search online of course!  After quite a bit of looking, I came up empty handed... I had ventured into uncharted territory.  The next couple days were spent waiting for inspiration to hit me.  I studied the shape of regular sized nail polish bottles and realized there were many shape possibilities.  That meant keeping my eyes peeled for the least expensive option to present itself.  What better place to be inspired by over sized containers?  Costco of course...


After purchasing my Cheese Balls, the next step was convincing my three children and various neighborhood friends to consume the entire mass of orange puffy goodness in the shortest amount of time possible.  Ha!  Actually that part was easy, of course each child took their responsibility to eat Cheese Balls very seriously.

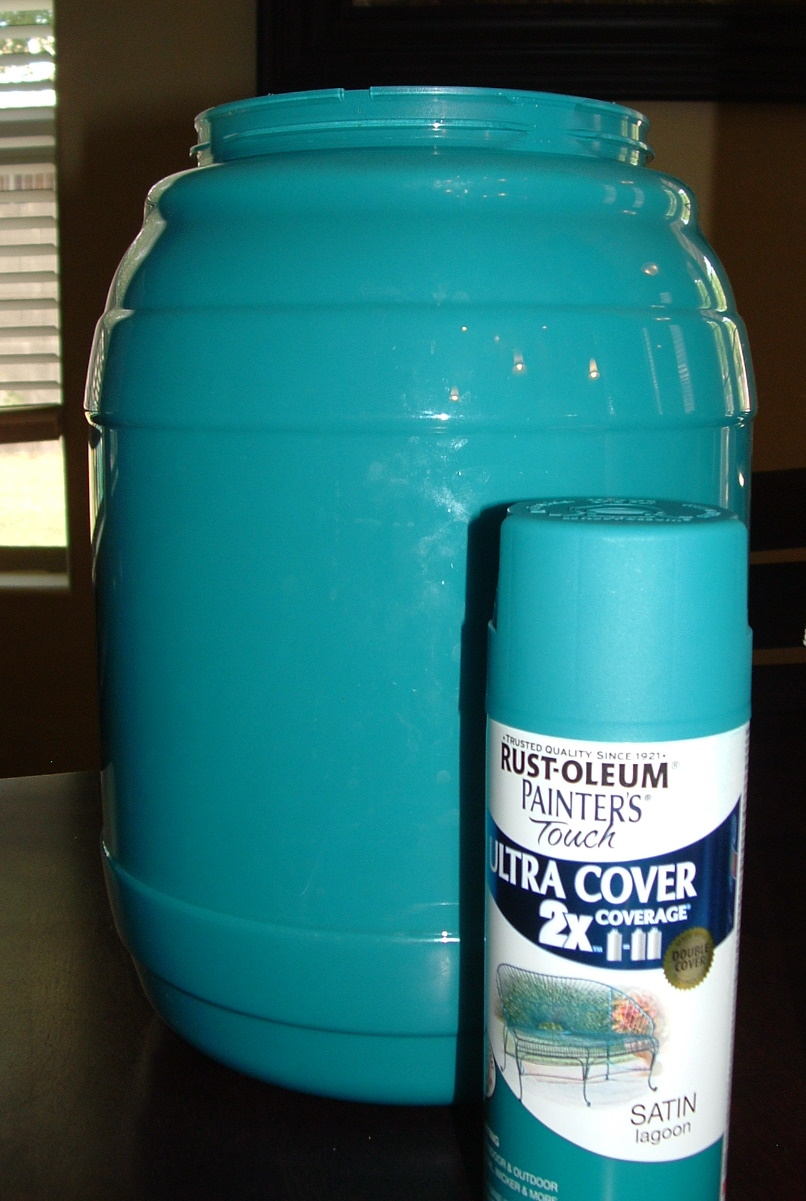
Along with the test of cheesey consumption endurance came the part of picking out a fabulous paint color to match the color scheme of the girls camp skit.  This is actually more difficult than you'd think, as spray paint colors are fewer in shades and hues than regular acrylic or latex paint.  After several stores I found a great color.  After washing the inside of the container, I tested the spray paint with one hand, while crossing my fingers with the other hand... in hopes that the color would appear as vibrant and dense as a bottle of nail polish would.  Success!


Next I constructed a tall black lid out of poster board, staples and glue and attached it to the Cheese Balls original purple lid with hot glue.


Next, I created a polish wand out of a paper towel tube and an old foam brush, and painted them black.


Yay!  Almost done... just a little teal colored paint added to the polish wand, and then attach it to the purple lid.


All finished!  It looked quite authentic, up close even... so it was perfect on stage!  Can you believe though, that one girl came up to me afterwards because she had bet her friend that it had been made from a Cheese Ball container?  She must eat a lot of Cheese Balls!